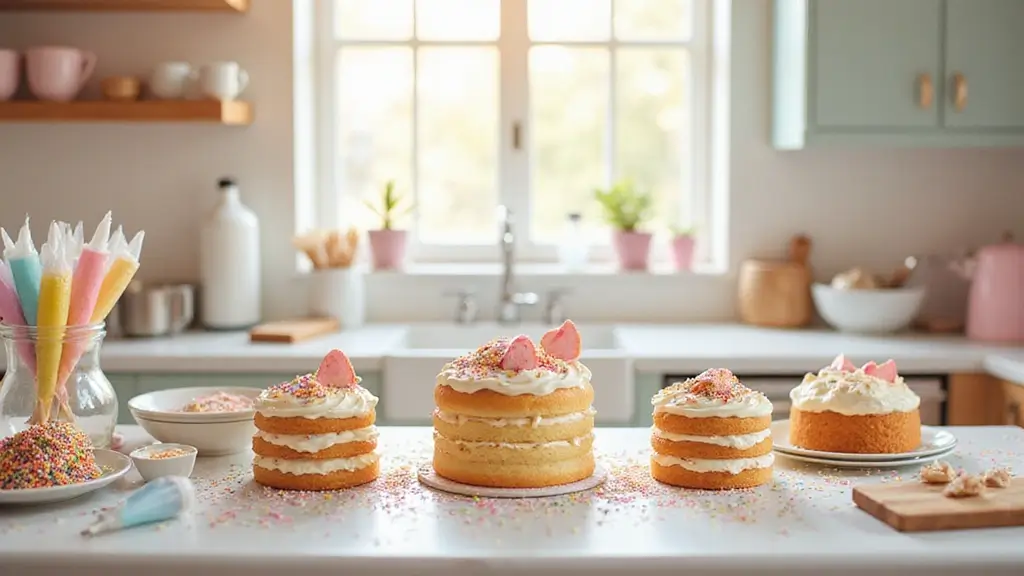
Baking a cake is just the beginning; decorating it is where the real fun begins! Whether you’re preparing for a birthday, an anniversary, or just a treat for yourself, cake decorating can be an enjoyable and rewarding experience. Imagine transforming a simple cake into a stunning centerpiece that becomes the talk of your gathering. With these 30 easy cake decorating ideas, you don’t need to be a professional to create something beautiful. From vibrant buttercream flowers to charming fondant creatures, each idea is tailored for beginners and requires minimal tools. You’ll find that decorating can be as simple as dolloping on frosting or as intricate as creating delicate lace patterns. It’s all about having fun and letting your creativity shine! Get ready to grab your piping bags and sprinkles, and let’s dive into these amazing cake decorating techniques that will elevate your baking game!
1. Classic Buttercream Swirls

Buttercream icing is a baker’s best friend! Its creamy texture and sweet flavor make it the perfect canvas for any cake. Start by whipping up a basic buttercream with softened butter, powdered sugar, vanilla extract, and a splash of milk for consistency. Once your buttercream is ready, use a piping bag fitted with a star tip to create beautiful swirls on top of your cake. You can easily alternate colors for a rainbow effect or stick with a classic pastel palette for a softer look. Don’t forget to sprinkle some edible glitter or tiny sugar pearls on top for extra flair!
– Ingredients: 1 cup butter, softened; 4 cups powdered sugar; 2 tsp vanilla extract; 2-4 tbsp milk.
– Nutrition: Approximately 100 calories per serving, depending on quantity used.
– Cook Time: 10 minutes to prepare.
Instructions:
1. In a bowl, cream the butter until smooth.
2. Gradually add in the powdered sugar, mixing until combined.
3. Stir in vanilla and add milk until desired consistency is reached.
4. Transfer to a piping bag and pipe swirls onto your cake.
For vibrant colors, gel food coloring works best. Experiment with different piping techniques to create unique designs!
FAQ: How long can buttercream be stored? It can last up to a week in the fridge in an airtight container.
2. Fun Fondant Shapes

Fondant might seem intimidating, but it’s quite straightforward to work with! This smooth icing can be rolled out and used to cover an entire cake or create whimsical shapes like flowers, stars, or cartoon characters. First, knead your fondant until it’s pliable, then roll it out to about 1/8-inch thickness. Cut out your desired shapes using cookie cutters or freehand for a personal touch. Attach these decorations to your cake with a little bit of water or edible glue. The great thing about fondant is that it not only looks professional but also adds a whole new texture to your cake. Play with colors and add accents like edible glitter or luster dust for an extra pop!
– Ingredients: 1 batch of homemade or store-bought fondant.
– Nutrition: 120 calories per serving, depending on the amount used.
– Prep Time: 30 minutes for making shapes.
Instructions:
1. Knead the fondant until soft and pliable.
2. Roll out to 1/8-inch thickness on a cornstarch-dusted surface.
3. Cut out shapes and attach to the cake with water or glue.
Work in small sections to avoid fondant drying out too quickly. Store leftover fondant in an airtight container.
FAQ: Can fondant be made ahead of time? Yes, you can make it a few days in advance and store it properly.
3. Chocolate Ganache Glaze

If you’re looking for a smooth and glossy finish, chocolate ganache is the way to go! This rich glaze is made by heating heavy cream and pouring it over chopped chocolate. The result? A luscious mixture that can be poured over cakes for an elegant touch. It’s important to let your ganache cool slightly before pouring, so it has just the right consistency to drip down the sides beautifully. You can even add flavorings like coffee or vanilla for an extra kick. This technique is perfect for a sophisticated dessert that looks like it came straight from a bakery!
– Ingredients: 1 cup heavy cream; 8 oz semisweet chocolate, chopped.
– Nutrition: Approximately 150 calories per serving.
– Cook Time: 15 minutes total.
Instructions:
1. Heat heavy cream in a saucepan until it starts to simmer.
2. Pour the hot cream over the chopped chocolate and let it sit for 5 minutes.
3. Whisk until smooth, letting it cool slightly before pouring over the cake.
Chill the cake slightly before pouring ganache for a sharper look. For a shiny finish, place in the fridge for a few minutes to set.
FAQ: How long does ganache last? It can be stored for about a week in the fridge in an airtight container.
Pour on the magic with chocolate ganache! A glossy finish can turn any cake into a showstopper. Just remember, patience is key for that perfect drizzle!
4. Fresh Fruit Toppers

Nothing says fresh like the addition of seasonal fruit on top of your cake! Strawberries, blueberries, or even slices of kiwi can turn a simple cake into a vibrant masterpiece. To incorporate fresh fruit, you can either arrange them neatly around the top or create a cascading effect down the sides. For added flavor, consider brushing the fruit with a light glaze made from apricot jam and water to give it a shiny finish. Remember to wash and dry your fruits thoroughly before placing them on your cake to ensure they stick well. This decoration technique not only looks stunning but also complements the flavor of your cake beautifully!
– Ingredients: Assorted fresh fruits of your choice.
– Nutrition: Varies depending on the fruit selection (approximately 50 calories per serving).
– Prep Time: 10-15 minutes.
Instructions:
1. Wash and dry your fruit thoroughly.
2. Arrange the fruit on top of the cake in your desired pattern.
3. Optional: Brush with a light glaze for shine.
Use fruits that are in season for the best flavor and appearance. Consider a mix of whole fruits and slices for variety.
FAQ: Can I use frozen fruit? Fresh fruit is recommended, but if using frozen, ensure it’s thawed and drained.
5. Edible Flowers

For a touch of elegance, edible flowers can transform your cake into a work of art. They come in various shapes and colors, making them perfect for any occasion. Common edible flowers include pansies, violets, and nasturtiums. When using flowers, ensure they are pesticide-free and safe for consumption. You can place them directly on top of the cake for a natural look or create a lovely floral wreath around the base for a more structured design. Not only do they add beauty, but they also introduce a subtle flavor that enhances your cake experience!
– Ingredients: Assorted edible flowers.
– Nutrition: Negligible calories, mostly for decoration.
– Prep Time: 5 minutes to arrange.
Instructions:
1. Choose fresh, pesticide-free edible flowers.
2. Rinse and dry them gently.
3. Arrange them as desired on the cake.
Pair with complementary flavors, such as lavender with lemon cake or roses with vanilla. Store the cake in a cool place to keep flowers fresh longer.
FAQ: Are all flowers edible? No, only specific varieties are safe. Do your research!
6. Colorful Sprinkles

Sprinkles are a classic cake decoration that never goes out of style! They add a playful and festive look that’s perfect for any celebration. You can cover the entire cake in sprinkles or use them to create unique designs. For added fun, consider using different shapes and sizes, from classic jimmies to vibrant confetti sprinkles. To make them stick, frost your cake generously before adding sprinkles, ensuring they adhere well. This technique is quick, easy, and perfect for any beginner looking to add a splash of joy to their creations. Plus, who can resist a cake covered in sprinkles?
– Ingredients: Assorted sprinkles of your choice.
– Nutrition: Approximately 50 calories per serving, depending on the quantity used.
– Prep Time: 5 minutes.
Instructions:
1. Frost your cake completely with buttercream.
2. Gently press sprinkles onto the frosting, covering the entire surface as desired.
Mix different types of sprinkles for a fun confetti look. Use a baking sheet underneath to catch excess sprinkles for easy cleanup.
FAQ: Can I make my own sprinkles? Yes, you can! Use colored sugar or homemade icing sugar to create fun shapes.
Sprinkles are the confetti of the cake world! A sprinkle-covered cake not only delights the eyes but also adds a burst of fun to any celebration. So grab your frosting and let those colorful sprinkles shine!
7. Whipped Cream Clouds

Light and airy whipped cream is another delightful way to decorate your cake. Its soft texture and creamy flavor can beautifully contrast a dense cake. To prepare whipped cream, simply beat heavy cream with a bit of sugar and vanilla until soft peaks form. You can use a piping bag with a star tip to create fluffy peaks on top of the cake, or spread it lightly for a more rustic look. Adding a few chocolate shavings or fresh fruit on top of the whipped cream can elevate the design even further. It’s an easy technique that can make your cake look and taste incredible!
– Ingredients: 1 cup heavy cream; 2 tbsp powdered sugar; 1 tsp vanilla extract.
– Nutrition: Approximately 80 calories per serving.
– Prep Time: 10 minutes.
Instructions:
1. In a mixing bowl, combine heavy cream, powdered sugar, and vanilla.
2. Beat until soft peaks form.
3. Pipe or spread on top of the cake, adding extra decorations if desired.
Chill your mixing bowl and beaters beforehand for better results. Avoid overbeating to prevent butter from forming.
FAQ: How long does whipped cream last? It’s best used fresh but can last a few hours at room temperature.
8. Marbled Icing

Marbling icing can add a stunning visual appeal to your cake with minimal effort! To achieve this, prepare your favorite buttercream icing and divide it into two or more bowls. Tint each with different gel colors, then take a spatula and swirl the colors together without fully blending. Spread the marbled icing onto your cake for a dreamy effect that looks mesmerizing! This technique allows for limitless color combinations and is perfect for artistic expression. You can even create themed designs for specific occasions, like pastel colors for spring or bright hues for a summer party!
– Ingredients: Your choice of buttercream icing; gel food coloring.
– Nutrition: Approximately 100 calories per serving.
– Prep Time: 15 minutes.
Instructions:
1. Prepare and color your buttercream in separate bowls.
2. Use a spatula to lightly swirl the colors together.
3. Apply the marbled icing to your cake.
Less is more! Swirl just enough to create a marbled effect without blending completely. Keep colors in mind to fit the season.
FAQ: Can marbled icing be used on fondant cakes? Yes, just ensure your fondant is properly set before applying.
9. Stenciled Patterns

Stenciling is a fun way to add intricate designs to your cake without requiring advanced skills. Start by choosing a stencil that matches your theme. Secure it against the cake using a bit of frosting or tape. Using a sifter, dust powdered sugar or cocoa powder over the stencil to reveal the design. Carefully lift the stencil away, and voila! You have a beautifully decorated cake that looks professionally done. This technique works well with both fondant and buttercream, allowing you to customize your cake for any occasion!
– Ingredients: Stencil, powdered sugar or cocoa powder.
– Nutrition: Negligible calories from the dusting.
– Prep Time: 10 minutes.
Instructions:
1. Secure the stencil against the frosted cake.
2. Sift powdered sugar or cocoa over the stencil.
3. Carefully lift the stencil to reveal the pattern.
Use contrasting colors for a more dramatic effect. Practice on parchment paper before applying to the cake.
FAQ: Can I make my own stencils? Yes! Cut designs from cardstock for custom stencils.
10. Layered and Textured Frosting

Bring depth and dimension to your cake with textured frosting! This technique involves applying your frosting in different ways to create a stunning visual appeal. Consider using a palette knife to create ridges or a comb tool to add stripes. You can even experiment with different frosting types, like a combination of buttercream and cream cheese, for varied textures. Adding a bit of edible luster dust can also enhance the effect. A textured cake is not only visually appealing but invites your guests to dig into the deliciousness inside!
– Ingredients: 2 batches of frosting (your choice), luster dust (optional).
– Nutrition: Approximately 100 calories per serving.
– Prep Time: 15 minutes.
Instructions:
1. Apply a generous layer of frosting to the cake.
2. Use a palette knife or comb to create texture.
3. Dust with luster if desired.
Keep your cake chilled for easier frosting handling. Use different colors for a more dynamic look!
FAQ: How do I achieve a smooth finish? Warm your spatula with hot water for smoother frosting application.
11. Drip Cake Technique

Drip cakes have become a trendy favorite for a reason. They combine elegance with a playful edge. To achieve this look, prepare a ganache or use melted chocolate, allowing it to cool slightly before drizzling it over the edges of your frosted cake. The key is to let it drip down the sides for that mouthwatering effect. You can also use colored candy melts for a fun twist! Top it off with sprinkles, fruits, or themed decorations to complete your masterpiece. This technique is perfect for birthdays and celebrations, leaving everyone eager to grab a slice!
– Ingredients: 1 cup chocolate, melted; 1/2 cup heavy cream (for ganache).
– Nutrition: About 150 calories per serving.
– Prep Time: 15 minutes.
Instructions:
1. Melt chocolate with cream until smooth.
2. Let cool to thick but pourable consistency.
3. Drizzle over the edges of the cake and let it drip.
Use a squeeze bottle for more control over the drip. Experiment with different colors and flavors.
FAQ: Can I use other types of chocolate? Yes, try white chocolate for a unique flavor!
Transform your cake into a showstopper with the drip technique! A little ganache goes a long way—add some sprinkles and watch your creation shine. Remember, it’s all about having fun while decorating!
12. Chocolate Shavings

Chocolate shavings can add a touch of sophistication to your cake, and they’re simpler to make than you might think! Use a vegetable peeler to slice thin curls from a chocolate bar, or you can grate chocolate over your cake for a different effect. Sprinkle these shavings over your frosted cake for a delightful look that complements any chocolate dessert perfectly. This decoration idea suits any occasion and pairs exceptionally well with chocolate ganache or whipped cream. It’s a small touch that can elevate your cake dramatically!
– Ingredients: 1 chocolate bar of your choice.
– Nutrition: Approximately 50 calories per serving.
– Prep Time: 5 minutes.
Instructions:
1. Use a vegetable peeler or grater on your chocolate bar.
2. Sprinkle the chocolate shavings on top of your cake.
Keep your chocolate bar slightly warm for easier shaving. Serve immediately to keep shavings from melting.
FAQ: Can I use milk chocolate? Yes, any chocolate variety will work beautifully.
13. Themed Cake Toppers

Themed cake toppers add a personal touch to any cake, especially for birthdays or celebrations. You can find pre-made decorations in stores or create your own using materials like cardstock, clay, or fondant. Consider your theme—whether it’s a favorite character, hobby, or milestone—and let that inspire your design. Once your cake is frosted, position the toppers securely in the center or even slightly off to the side for an artistic flair. It provides a perfect finishing touch that can make a simple cake feel truly special!
– Ingredients: Assorted toppers (store-bought or homemade).
– Nutrition: Varies depending on the materials used.
– Prep Time: 15-30 minutes depending on creation.
Instructions:
1. Create or gather your themed toppers.
2. Frost your cake and allow it to set.
3. Position the toppers securely on the cake.
Choose toppers that match the color scheme of your cake for cohesive design. Make sure any materials you use are safe for food!
FAQ: Can I make my own toppers? Absolutely, use materials that are food-safe and suitable for cake decoration.
14. Candy Bar Cake

Why settle for simple decorations when you can create a candy explosion? A candy bar cake is a fun and playful option that combines cake and candy into one delightful dessert. Frost your cake with your favorite icing, then stick an assortment of candies onto the sides and top. Think colorful gummy bears, chocolate bars, or even lollipops for height. This eye-catching design is sure to be a hit among kids and adults alike, making it perfect for parties or casual gatherings. Plus, the best part is that you can customize it based on your favorite sweets!
– Ingredients: Your choice of frosted cake; assorted candies.
– Nutrition: Varies widely depending on candy selection.
– Prep Time: 10 minutes.
Instructions:
1. Frost your cake generously.
2. Stick assorted candies onto the cake securely.
Use candies that are sturdy to ensure they don’t fall off. Consider matching the candy colors with the frosting for a cohesive design.
FAQ: What candies work best? Anything sturdy like chocolate bars or gummies works well!
15. Ganache Drip with Sprinkles

Take the drip cake to the next level by adding sprinkles to your ganache drip! The glossy finish of ganache combined with the playful crunch of sprinkles creates a delightful contrast. Prepare your ganache as shown in a previous section, then allow it to cool slightly before applying it to your frosted cake. Once the ganache drips down the sides, sprinkle a medley of colorful sprinkles while it’s still wet. This combination creates a fun and inviting cake that is perfect for birthdays, celebrations, or just a sweet treat for yourself!
– Ingredients: 1 cup chocolate, melted; 1/2 cup heavy cream (for ganache); assorted sprinkles.
– Nutrition: Approximately 200 calories per serving.
– Prep Time: 15 minutes.
Instructions:
1. Melt chocolate and cream as previously described.
2. Allow ganache to cool slightly, then drizzle over the cake.
3. Immediately top with sprinkles while the ganache is still setting.
Experiment with different types of sprinkles to fit your theme. Use a squeeze bottle for precise ganache drips.
FAQ: Can I use colored chocolate instead of ganache? Yes, colored candy melts can create a fun effect!
16. Frosting Flowers

Frosting flowers are an elegant way to embellish your cake and impress your guests. Using a piping bag with a petal tip, you can create beautiful blooms that look like they came from a bakery. Start with a base of green frosting for leaves, then pipe petals in circular motions to mimic real flowers. Practice makes perfect, so don’t get discouraged if your first attempts don’t go as planned. You can use different colors for a more vibrant effect, and these flowers will last all day without wilting, making them perfect for outdoor events!
– Ingredients: Buttercream frosting; gel food coloring.
– Nutrition: Approximately 100 calories per serving.
– Prep Time: 15 minutes for flowers.
Instructions:
1. Prepare your frosting and color as desired.
2. Use a petal tip and a piping bag to create flower shapes on parchment paper.
3. Allow to set before placing on the cake.
Practice piping on parchment before attempting flowers on the cake. Refrigerate the flowers to keep their shape.
FAQ: Can I use royal icing? Yes, it’s a great alternative that hardens beautifully.
17. Layered Cake with Different Flavors

Transform a standard cake into an exciting layered masterpiece by experimenting with different flavors! Create layers of chocolate, vanilla, and red velvet, or mix in fruity flavors like lemon or strawberry. Stack the layers with different colored frostings or fillings like jams or creams for a visual and taste sensation that will wow your guests. Each slice reveals delightful surprises, making it perfect for celebrations or just to treat yourself. Layering different flavors can take your cake from ordinary to extraordinary!
– Ingredients: Your choice of cake mix or batter; assorted frostings and fillings.
– Nutrition: Varies depending on layers. Approximately 300 calories per serving.
– Prep Time: 1 hour for baking and assembling.
Instructions:
1. Bake cakes in different flavors according to package or recipe instructions.
2. Alternate stacking layers with frosting and fillings.
3. Frost the outside of the cake for a finishing touch.
Use a serrated knife to level your cakes for even stacking. Experiment with flavor combinations for unique results.
FAQ: Can I freeze layers for later use? Absolutely! Wrap them tightly and store them in the freezer.
18. Cake Pop Decoration

Cake pops are a fun and delightful way to use leftover cake, and decorating them can be a creative process! Start with crumbled cake mixed with frosting, then form into balls and freeze until solid. Dip each ball in melted chocolate, letting any excess drip off before decorating with sprinkles, edible glitter, or drizzles of contrasting chocolate. You can also use skewers or sticks for easy handling and presentation. Cake pops are perfect for parties, offering a bite-sized treat that can be personalized to fit any theme!
– Ingredients: Leftover cake; frosting; chocolate for dipping; sprinkles.
– Nutrition: Approximately 100 calories per pop.
– Prep Time: 30 minutes.
Instructions:
1. Crumble the leftover cake and mix with frosting.
2. Roll into balls and freeze until firm.
3. Dip in melted chocolate and decorate as desired.
Use a styrofoam block to hold pops upright while they dry. Experiment with different flavors of cake for variety.
FAQ: How do I make cake pops without crumbling? Ensure your mixture is moist but firm enough to hold shape.
19. Negative Space Cake

Negative space cakes are an innovative way to decorate without overwhelming the senses. Instead of frosting the whole cake, leave sections of the cake exposed to create a stunning and modern look. Layer the exposed areas with contrasting colors or textures, like buttercream and ganache, to let the cake shine through. This technique is perfect for minimalistic themes and brings a chic elegance to your dessert. With this approach, simplicity is key, and the focus remains on the beauty of the cake itself!
– Ingredients: Your choice of cake and frosting.
– Nutrition: Varies based on ingredients used. Approximately 250 calories per serving.
– Prep Time: 30 minutes.
Instructions:
1. Frost your cake partially, leaving sections bare for negative space.
2. Create contrasting textures or colors in the frosted areas.
Use a sharp knife to create clean edges for the negative space. Consider a monochromatic color palette for elegance.
FAQ: Can I add toppings to exposed areas? Yes, they can enhance the look without overpowering the design.
20. Ombre Cake Design

Ombre cakes are visually striking and easy to achieve! This technique involves creating a gradient effect by blending different shades of the same color for a smooth transition across the cake. Begin by dividing your frosting into several bowls and tint each one with varying amounts of food coloring. Spread the darkest shade at the base and gradually work your way to the lightest at the top. The result? A stunning cake that looks professionally done without the need for expert skills. Ombre designs can be tailored to any color scheme to fit the occasion!
– Ingredients: Buttercream frosting; gel food coloring.
– Nutrition: Approximately 100 calories per serving.
– Prep Time: 20 minutes.
Instructions:
1. Tint frosting in shades of the same color.
2. Frost the cake starting from the darkest to lightest shade, blending as you go.
Use a bench scraper for smooth transitions between colors. Experiment with different color combinations for unique results.
FAQ: Can I use fondant for ombre? Yes, fondant can be tinted and applied similarly for a different effect.
21. Frosted Cookie Crust

Why not combine cookies and cake for a unique dessert experience? A frosted cookie crust provides a delicious base for your cake, adding a crunchy texture that beautifully complements the soft layers of cake. Simply bake your favorite cookie dough in a round cake pan, let it cool, and frost as you would a regular cake. This technique offers a fun twist that is deliciously satisfying and visually appealing. Guests will be delighted by the surprise of a cookie crust hidden beneath the frosting!
– Ingredients: Cookie dough of your choice; frosting.
– Nutrition: Varies based on cookie and frosting. Approximately 150 calories per serving.
– Prep Time: 20 minutes.
Instructions:
1. Bake cookies in a cake pan according to recipe instructions.
2. Let cool, then frost as desired.
Use a thicker cookie recipe for best results. Serve chilled for a delightful texture!
FAQ: Can any cookie recipe work? Yes, just ensure it holds its shape when baked.
22. Swirled Frosting Design

Swirling frosting creates a beautiful and soft appearance that can make any cake look artfully made. To achieve this effect, prepare your frosting in two or more colors and load them into a piping bag fitted with a star tip. When you squeeze the bag, the colors will swirl together into pretty patterns. You can create a stunning effect by alternating colors on the top and sides, making the cake appear intricate without needing advanced skills. This technique is perfect for celebrations or casual get-togethers, giving your cake a vibrant touch!
– Ingredients: Buttercream frosting in multiple colors.
– Nutrition: Approximately 100 calories per serving.
– Prep Time: 15 minutes.
Instructions:
1. Prepare multiple colors of frosting and place in a piping bag.
2. Pipe onto the cake, swirling as you go.
Use gel food coloring to achieve vibrant shades. Experiment with different piping techniques to create varied designs.
FAQ: Can I mix colors beforehand? Mixing too much may create a muddy color, so keep them separated until piping.
23. Glitter and Edible Dust

Add a touch of glamour to your cake with edible glitter and dust! These shiny toppings can take your cake from plain to spectacular with minimal effort. Dust the top or sides of your cake with edible glitter or luster dust for an instant sparkle that catches the eye. Note that a little goes a long way, so apply sparingly for the best effect. This decoration technique works beautifully with a variety of cake styles, from elegant wedding cakes to cheerful birthday treats. It’s an easy way to elevate your cake and impress your guests!
– Ingredients: Edible glitter or luster dust.
– Nutrition: Negligible calories.
– Prep Time: 5 minutes.
Instructions:
1. Use a clean brush to lightly dust the cake with edible glitter or luster dust.
Choose a color that complements your cake design. Always check that the glitter is edible!
FAQ: Can I use regular glitter? No, only edible glitter is safe for consumption.
24. Cookie Crumb Coating

For a fun and whimsical look, consider coating your cake with cookie crumbs! After frosting your cake, gently press crushed cookies onto the sides and top for an added crunch and flavor. This technique works particularly well with chocolate or vanilla cakes paired with Oreos or graham crackers. The combination of textures will delight your guests and make your cake an instant hit! This easy decoration looks great and adds a delicious twist!
– Ingredients: Crushed cookies of your choice and frosting.
– Nutrition: Approximately 150 calories per serving.
– Prep Time: 10 minutes.
Instructions:
1. Frost your cake generously.
2. Gently press cookie crumbs onto the frosted surfaces.
Use an offset spatula to help with even application. Consider mixing flavors for complexity!
FAQ: How do I crush cookies? Place them in a plastic zip bag and crush with a rolling pin or food processor.
25. Candy Melt Decorations

Using candy melts is a fun way to create custom decorations for your cake. Melt the candy melts according to package instructions, then pour them into molds to create shapes like stars, hearts, or even little animals. Once they’ve hardened, you can place these edible decorations on your cake for an eye-catching effect. Candy melts come in various colors, making it easy to match your cake theme. This technique is perfect for birthdays or festive occasions, adding a playful touch that guests of all ages will love!
– Ingredients: Candy melts of your choice.
– Nutrition: Varies based on quantity used. Approximately 50 calories per piece.
– Prep Time: 15 minutes.
Instructions:
1. Melt the candy melts as per instructions.
2. Pour into molds and let harden.
3. Decorate your cake with the finished shapes.
Use silicone molds for easier removal. Work in small batches to prevent cooling while working.
FAQ: Can I use chocolate instead? Yes, but tempering chocolate requires a bit more skill.
Unleash your creativity with candy melts! These colorful treats not only delight the taste buds but also transform your cake into a work of art. Get ready to impress your guests with easy decorations anyone can create!
26. Whimsical Macaron Accents

Macarons are not just delicious; they also make beautiful cake decorations! These delicate French cookies can be used as toppers or accents on your cake. Their range of colors and flavors can enhance the overall look while adding a delightful crunch. You can stack them on top or place them around the base for a whimsical flair. For added style, consider placing them in towers for a striking display. Macarons can elevate the look of any cake and are sure to impress your guests with their beauty and taste!
– Ingredients: Macarons of your choice.
– Nutrition: Approximately 70 calories per macaron.
– Prep Time: 20 minutes to arrange.
Instructions:
1. Prepare or purchase macarons.
2. Arrange them on or around your frosted cake.
Match the flavors of the macarons with the cake for a cohesive taste experience. Use a strong base to ensure they stay upright.
FAQ: Are macarons difficult to make? They can be tricky, but store-bought options work beautifully too!
27. Glazed Fruit Tart Topping

Layering a fruit tart on top of your cake can be a stunning combination of flavors and textures! To prepare, bake a fruit tart shell and fill it with pastry cream or whipped cream. Top it with an assortment of fresh fruit, and brush with a light glaze made from apricot jam and water to make it shine. This decoration not only adds beauty to your cake but also introduces refreshing flavors that balance sweetness perfectly. It’s an ideal choice for summer birthdays or any occasion where you want a lighter dessert!
– Ingredients: Fruit tart shell; pastry cream or whipped cream; assorted fresh fruits; apricot jam.
– Nutrition: Varies depending on the ingredients. Approximately 200 calories per slice.
– Prep Time: 30 minutes.
Instructions:
1. Bake the tart shell and fill it with cream.
2. Arrange fruit on top and brush with glaze.
Choose fruits that are in season for the best flavor. Use a variety of colors for visual appeal!
FAQ: Can I use canned fruit? Yes, but fresh fruit looks and tastes better!
28. Chocolate-Covered Pretzel Accents

Adding chocolate-covered pretzels to your cake can introduce a fun crunch and sweet-salty flavor contrast. Dip pretzel rods or twists in melted chocolate and let them harden. Once set, you can stick them into the cake vertically or lay them flat on top for a playful design. To enhance the look, drizzle additional melted chocolate over them or sprinkle with colorful sprinkles. This unique decoration is not only tasty but also adds an exciting visual element to your cake, making it a crowd-pleaser!
– Ingredients: Pretzels; chocolate for dipping; sprinkles (optional).
– Nutrition: Approximately 100 calories per pretzel.
– Prep Time: 15 minutes.
Instructions:
1. Melt chocolate according to package instructions.
2. Dip pretzels into chocolate and let cool until set.
3. Arrange them creatively on your cake.
Use different types of chocolate for added visual variety. Store leftover pretzels in an airtight container for later enjoyment.
FAQ: Can I use white chocolate? Yes, it adds a lovely contrast with the pretzels!
29. Buttercream Ruffle Technique

Buttercream ruffles add an elegant and textured look to your cake, perfect for any special occasion. Using a star tip, pipe overlapping ruffles around your cake, starting from the bottom and working your way up. This technique allows for creativity in both color choice and design. You can create a gradient effect by changing colors as you pipe or keep it monochromatic for a classic feel. The fluttery texture adds sophistication and whimsy to your cake, making it a standout centerpiece!
– Ingredients: Buttercream frosting in desired colors.
– Nutrition: Approximately 100 calories per serving.
– Prep Time: 20 minutes.
Instructions:
1. Load frosting into a piping bag fitted with a star tip.
2. Pipe ruffles around the sides of the cake, overlapping slightly.
Practice on a piece of parchment paper to perfect your technique. Vary the pressure for different sizes of ruffles!
FAQ: How do I stop ruffles from collapsing? Ensure your frosting is well-chilled for better stability.
30. Cake Stand Presentation

The way you present your cake can enhance its appeal dramatically. Using a decorative cake stand can add height and elegance, making your cake the star of the table. Consider using a vintage stand for a classic feel or a modern geometric design for a contemporary look. You can also add a simple backdrop of flowers or greenery to create an Instagram-worthy display. A beautiful presentation sets the mood for any occasion and ensures your cake gets the attention it deserves!
– Ingredients: Your completed decorated cake; decorative cake stand; optional flowers or greenery.
– Nutrition: N/A.
– Prep Time: 5 minutes for setup.
Instructions:
1. Carefully transfer the cake to a decorative stand.
2. Arrange flowers or greenery around the base if desired.
Choose a cake stand that complements your cake colors. Keep it simple to let the cake shine!
FAQ: Can I use a regular plate instead? Yes, but a stand creates a more dramatic effect.
Conclusion

Decorating a cake at home can be both fun and fulfilling, allowing you to express your creativity and impress family and friends. With these 30 easy cake decorating ideas, you can transform any cake from simple to stunning without needing professional skills or fancy equipment. Whether you choose to pipe swirls, add fresh fruit, or go for a playful candy theme, the possibilities are endless. Remember, the best ingredient in any cake is the love and effort you put into making it. So, gather your supplies, invite friends over, and start creating your own cake masterpieces!
Frequently Asked Questions
What are some beginner-friendly cake decorating techniques I can try at home?
If you’re new to cake decorating, starting with simple techniques can help you build confidence. Consider beginning with classic buttercream swirls or using colorful sprinkles for a festive touch.
You can also experiment with fresh fruit toppers or whipped cream clouds to elevate your cake without any complicated skills. These easy cake decoration ideas are not only fun but also allow you to express your creativity!
How can I make my cake decorations look more professional?
To achieve a more professional look, focus on clean lines and smooth finishes. Techniques like marbled icing or the drip cake method can add a sophisticated flair.
Additionally, using tools like piping bags for frosting flowers or stencils for patterns can help create intricate designs that impress. Remember, practice makes perfect, so don’t hesitate to experiment until you find your style!
Are there any tips for decorating a cake with fondant?
Using fondant can seem intimidating, but with a few tips, you can master it! Start with a well-prepared cake that’s chilled—this helps the fondant stick better.
Roll the fondant out evenly and use cornstarch to prevent sticking. Once applied, you can create fun shapes or even cover the entire cake for a sleek look. Don’t forget to experiment with colors and textures to create stunning DIY cake ideas!
What are some creative cake designs that anyone can recreate?
Get creative with your cake designs by trying out ideas like an ombre cake or a negative space cake. Ombre cakes use different shades of the same color for a beautiful gradient effect, while negative space cakes leave sections exposed for a modern look.
Layered cakes with different flavors also add an exciting twist! With a little imagination, you can transform a simple cake into a stunning centerpiece.
How can I safely store a decorated cake?
Storing a decorated cake properly is crucial to maintain its freshness and appearance. If your cake has fondant decorations, keep it in a cool, dry place, ideally in a cake box to prevent dust or damage.
If you have perishable decorations, like fresh fruit or whipped cream, refrigerate your cake. Just remember to bring it back to room temperature before serving for the best flavor and texture!