
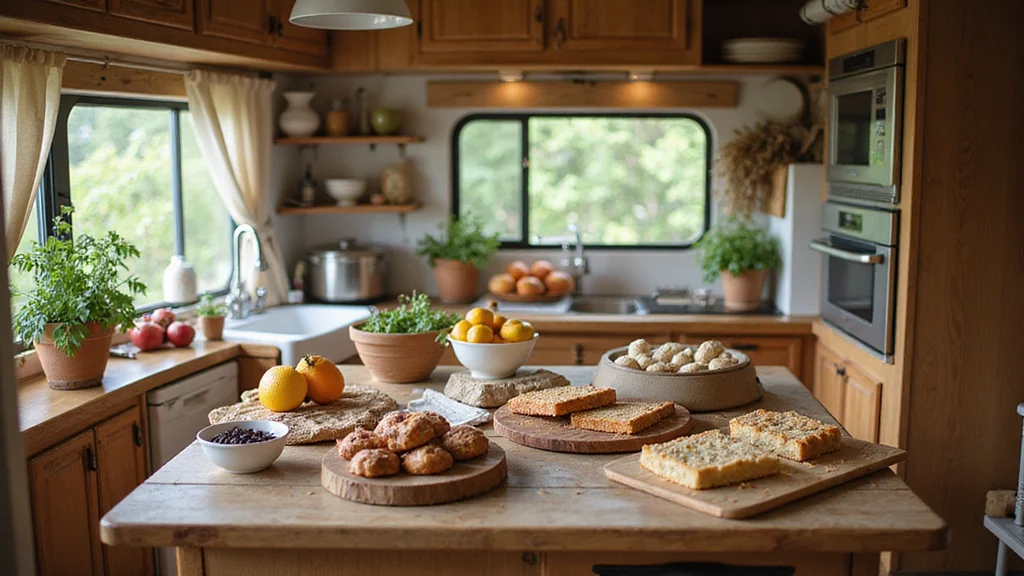
Are you ready to whip up some delicious treats while on the road? I created this post because traveling in an RV should be just as sweet as the desserts you enjoy. If you’re an RV enthusiast who loves to bake or someone who simply wants easy travel desserts, you’re in the right place.
I know that baking in a compact RV kitchen can feel challenging, especially if you’re gluten-free. That’s why I’ve gathered 10 RV baking recipes that are not only travel-friendly but also gluten-free. These treats are designed to be easy to pack and even easier to enjoy wherever your adventures take you. Whether you’re parked at a scenic campsite or taking a break on a long drive, these yummy sweets will bring a smile to your face.
From quick baking ideas like Gluten-Free Chocolate Chip Cookies to refreshing Lemon Coconut Energy Bars, each recipe is crafted to fit your mobile lifestyle. Plus, they don’t require fancy equipment or hard-to-find ingredients. You’ll find compact baking treats that can satisfy your cravings without the hassle.
So if you’re looking for RV-friendly desserts that make your journey a little sweeter, check out these portable sweet recipes. Get ready to bake, pack, and hit the road with treats that everyone will love!
Key Takeaways
– Each recipe is gluten-free, making it easy for those with dietary restrictions to indulge.
– All recipes are designed for compact kitchens, requiring minimal equipment and ingredients.
– Enjoy a variety of flavors, from classic cookies to energy bars, catering to different taste preferences.
– The recipes can be prepared in a short time, ensuring you spend less time baking and more time enjoying your travels.
– These treats are perfect for sharing, making your RV experiences even more fun with family and friends.
1. Gluten-Free Chocolate Chip Cookies

Recipe Details
Ingredients:
– 1 cup almond flour
– 1 cup gluten-free rolled oats
– 1/2 cup coconut sugar
– 1/2 cup chocolate chips
– 1/4 cup coconut oil, melted
– 1 egg
– 1 tsp vanilla extract
– 1/2 tsp baking soda
Instructions:
1. Preheat your RV oven to 350°F (175°C).
2. In a bowl, mix almond flour, oats, coconut sugar, and baking soda.
3. In another bowl, whisk together melted coconut oil, egg, and vanilla extract.
4. Combine the wet and dry ingredients, then fold in the chocolate chips.
5. Scoop tablespoon-sized portions onto a baking sheet lined with parchment paper.
6. Bake for 10-12 minutes until edges are golden.
7. Allow to cool before enjoying!
Tips:
– Experiment with different types of chocolate or nuts for variety!
– Store in an airtight container for freshness.
Frequently Asked Questions:
1. Can I use a different sweetener?
– Yes. Swap coconut sugar with brown sugar or maple syrup.
2. Are these cookies safe to freeze?
– Absolutely. They freeze well; thaw before serving.
Gluten-Free Chocolate Chip Cookies
Editor’s Choice

King Arthur, Almond Flour, Certified Gluten-Free, Non-GMO Project Verifi…

Bob’s Red Mill Almond Flour, 16oz (Pack of 4) – Non GMO, Vegan, Paleo Fr…

16 oz Organic Almond Flour Powdered Gluten Free Low Glycemic Non-GMO by …

Bob’s Red Mill Gluten Free Organic Old Fashioned Rolled Oats, 32oz (Pack…

Nature’s Path Organic Gluten Free Steel Cut Whole Grain Oats, Non-GMO, 5…
2. Easy No-Bake Peanut Butter Bars

Recipe Details
Ingredients:
– 1 cup natural peanut butter
– 1/2 cup honey
– 2 cups gluten-free oats
– 1/2 cup dark chocolate chips (optional)
Instructions:
1. In a large bowl, combine peanut butter and honey until smooth.
2. Mix in the gluten-free oats until fully combined.
3. Stir in chocolate chips if using.
4. Press the mixture into a greased 8×8 inch pan.
5. Refrigerate for at least 2 hours before cutting into bars.
6. Store in the fridge for up to a week!
Tips:
– Use natural peanut butter for best flavor.
– Add dried fruit or nuts for extra texture.
Frequently Asked Questions:
1. Can I use almond butter instead?
– Yes, almond butter works great.
2. How do I store these bars?
– Keep in the fridge or a cooler during travels.
Easy No-Bake Peanut Butter Bars
Editor’s Choice

SKIPPY Natural Peanut Butter Spread, Creamy, 7 g protein per serving, 15…

Kirkland Organic Creamy Peanut Butter U.S. Valencia Peanuts 28 Ounce Eac…

Once Again Organic Creamy Peanut Butter, 16oz – Lightly Salted, Unsweete…

Wegmans Organic Peanut Butter, Creamy (2) 40oz Containers. 80oz Pack

Peter Pan Creamy Peanut Butter, Made with Roasted Peanuts, Great for Pea…
3. Zucchini Banana Muffins

Recipe Details
Ingredients:
– 1 cup mashed ripe bananas
– 1 cup grated zucchini (squeeze out excess moisture)
– 1/2 cup almond flour
– 1/2 cup gluten-free rolled oats
– 1/4 cup honey
– 1/4 cup coconut oil, melted
– 2 eggs
– 1 tsp baking powder
– 1 tsp vanilla extract
Instructions:
1. Preheat your RV oven to 350°F (175°C).
2. In a mixing bowl, combine mashed bananas, grated zucchini, honey, eggs, and melted coconut oil.
3. In another bowl, mix almond flour, oats, and baking powder.
4. Combine wet and dry ingredients until just mixed.
5. Pour the batter into a greased muffin tin.
6. Bake for 18-20 minutes, or until a toothpick comes out clean.
7. Let cool for a few minutes before removing from the tin.
Tips:
– Add chocolate chips or nuts for extra texture!
– Store in an airtight container to keep them fluffy.
Frequently Asked Questions:
1. Can I use other flours?
– Yes, but adjust the liquid as different flours soak up moisture differently.
2. Are these muffins kid-friendly?
– Absolutely. They’re a nutritious snack for all ages.
Zucchini Banana Muffins
Editor’s Choice

3Pcs Silicone Muffin Pan 6, 12 and 24 Cup with Metal Frame, Non Stick Ju…

BRONYPRO Silicone Muffin Pans for Baking with Metal Frame, Egg Bite Mold…

USA Pan Bakeware Muffin Pan, 12-Well, Aluminized Steel


GreenLife 12-Cup Muffin Pan, PFAS-Free Healthy Nonstick Baking Tray, 11….
4. Fruit & Nut Energy Balls

Recipe Details
Ingredients:
– 1 cup pitted dates
– 1/2 cup almonds
– 1/4 cup walnuts
– 1/4 cup shredded coconut
– 1/4 cup pumpkin seeds
– Pinch of salt
Instructions:
1. In a food processor, blend the dates until they form a sticky paste.
2. Add the almonds and walnuts and blend until coarse crumbs form.
3. Stir in coconut and pumpkin seeds until mixed.
4. Roll the mixture into bite-sized balls and place on a baking sheet.
5. Refrigerate for at least 30 minutes until firm.
6. Store in an airtight container in the fridge for up to a week.
Tips:
– You can substitute nuts based on your preference.
– Add cocoa powder for a chocolate twist!
Frequently Asked Questions:
1. Do I have to use nuts?
– No, you can use seeds for a nut-free version.
2. Can I use dried fruit?
– Absolutely. Apricots or cranberries work well too.
Fruit & Nut Energy Balls are your RV baking recipes hack—date paste binds everything, no oven needed. Pulse, roll, chill, and grab a bite on the go. Save time, stay fueled, and keep gluten-free munchies handy for every road trip.
Fruit & Nut Energy Balls
Editor’s Choice

Hamilton Beach Stack & Snap 4-Cup Mini Food Processor & Vegetable Choppe…

Braun CH3012BK EasyPrep™ Mini Food Processor, 4 cup, Black

Cuisinart Mini-Prep Plus Food Processor, 24-Ounce Mini Food Processor to…

Cuisinart Mini-Prep Plus Food Processor, 24-Ounce Mini Food Processor to…

5. Coconut Macaroons

Recipe Details
Ingredients:
– 2 cups shredded unsweetened coconut
– 1/2 cup egg whites (about 2 large eggs)
– 1/4 cup honey or maple syrup
– 1 tsp vanilla extract
– Pinch of salt
Instructions:
1. Preheat your RV oven to 325°F (163°C).
2. In a mixing bowl, combine shredded coconut, egg whites, honey, vanilla, and salt until well mixed.
3. Use a small cookie scoop to drop rounded tablespoons onto a baking sheet lined with parchment paper.
4. Bake for 12-15 minutes until the tops are golden.
5. Allow to cool before serving.
Tips:
– Dip the bottoms in dark chocolate for an extra treat!
– Store in an airtight container to maintain freshness.
Frequently Asked Questions:
1. Can I use sweetened coconut?
– Yes, but reduce the honey to keep sweetness balanced.
2. How long do they last?
– Up to a week in an airtight container.
Coconut Macaroons
Editor’s Choice

Silicone Baking Mat Set of 5-2 Half Sheets (Macaron & Cookie Circle On M…

Nuanchu 8 Pieces Silicone Baking Mat Non-stick Silicone Baking Half Shee…

Silicone Baking Mat Set of 6, GUANCI Grade Food Baking mats Non-Stick Re…


KitchenAid Cookie Dough Scoop Set, Set Of 3, Black
6. Apple Cinnamon Oatmeal Bake

Recipe Details
Ingredients:
– 2 cups gluten-free rolled oats
– 2 cups almond milk
– 2 apples, chopped
– 1/4 cup maple syrup
– 1 tsp cinnamon
– 1 tsp vanilla extract
– Pinch of salt
Instructions:
1. Preheat your RV oven to 350°F (175°C).
2. In a bowl, mix oats, almond milk, chopped apples, maple syrup, cinnamon, vanilla, and salt.
3. Pour the mixture into a greased baking dish.
4. Bake for 30 minutes, until golden and set.
5. Let cool before serving!
Tips:
– Top with yogurt or nuts for extra flavor!
– It can be stored in the fridge for up to 5 days.
Frequently Asked Questions:
1. Can I use other types of milk?
– Yes. Any milk alternative works well.
2. How do I reheat it?
– Warm in the microwave or RV oven.
“Fun fact: In a compact RV oven, 2 cups gluten-free rolled oats bake into a cozy Apple Cinnamon Oatmeal Bake in about 30 minutes. For rv baking recipes, add 2 apples and a drizzle of maple syrup, and you’ve got a travel-friendly breakfast that tastes like home.”
Apple Cinnamon Oatmeal Bake
Editor’s Choice

Bob’s Red Mill Gluten Free Old Fashioned Rolled Oats, 32oz (Pack of 4) -…

One Degree Organic Foods Sprouted Rolled Oats, USDA Organic, Non-GMO Glu…

Califia Farms – Organic Unsweetened Almond Milk, 32 Oz (Pack of 6), Dair…

4 QT Baking Dish, Casserole Dishes for Oven, 9×13 Baking Pan with Handle…

Amazon Basics Glass Baking Dishes with BPA-Free Lids, 6-Piece Set, Boros…
7. S’mores Brownies

Recipe Details
Ingredients:
– 1 cup gluten-free flour
– 1/2 cup cocoa powder
– 1/2 cup sugar
– 1/4 cup coconut oil
– 1/2 cup almond milk
– 1 cup mini marshmallows
– 1/2 cup chocolate chips
Instructions:
1. Preheat your RV oven to 350°F (175°C).
2. In a bowl, mix gluten-free flour, cocoa powder, and sugar.
3. Stir in melted coconut oil and almond milk until well combined.
4. Pour the batter into a greased baking dish.
5. Bake for 20 minutes, then sprinkle marshmallows and chocolate chips on top and bake for an additional 5 minutes until marshmallows are golden.
6. Let cool before cutting into squares.
Tips:
– Serve warm for a melty s’mores effect!
– Add crushed graham crackers on top for extra crunch.
Frequently Asked Questions:
1. Can I use regular flour?
– Yes, but it won’t be gluten-free.
2. How should I store these brownies?
– Keep in an airtight container at room temperature.
S’mores Brownies
Editor’s Choice

Bob’s Red Mill Gluten Free 1-to-1 Baking Flour, 25 Pound


King Arthur Measure for Measure Gluten-free Flour 5 lbs., 2 Pack

Pamela’s Products Gluten Free All Purpose Flour Blend, 4 Pound

Krusteaz Gluten Free All-Purpose Flour, No Artificial Flavors, Colors, o…
8. Pumpkin Spice Muffins

Recipe Details
Ingredients:
– 1 cup pumpkin puree
– 1/2 cup almond flour
– 1/2 cup gluten-free rolled oats
– 1/4 cup honey
– 2 eggs
– 1 tsp pumpkin spice
– 1 tsp baking soda
Instructions:
1. Preheat your RV oven to 350°F (175°C).
2. In a bowl, combine pumpkin puree, honey, eggs, and pumpkin spice until smooth.
3. In another bowl, mix almond flour, oats, and baking soda.
4. Combine the wet and dry ingredients and stir until just mixed.
5. Pour the batter into a greased muffin tin.
6. Bake for 18-20 minutes until a toothpick comes out clean.
7. Let cool before enjoying!
Tips:
– Add nuts or chocolate chips for extra flavor!
– Store in an airtight container for freshness.
Frequently Asked Questions:
1. Can I use fresh pumpkin?
– Yes, just puree smoothly.
2. How do I reheat these muffins?
– Warm in a microwave or RV oven for a few seconds.
On the road, the best comfort is a warm pumpkin muffin that fits in a cup holder. These rv baking recipes prove gluten-free can be cozy, practical, and surprisingly fluffy with almond flour and oats. Bake small batches, snackable delights that keep RV life delicious.
Pumpkin Spice Muffins
Editor’s Choice
Bob’s Red Mill Almond Flour, 16oz (Pack of 4) – Non GMO, Vegan, Paleo Fr…

King Arthur Flour Gluten-Free Almond Flour, 16 Ounce (Pack of 4)

Spiceology – Pumpkin Spice Blend – Warm Spice Mix with Cinnamon, Nutmeg,…
BRONYPRO Silicone Muffin Pans for Baking with Metal Frame, Egg Bite Mold…

Nonstick Muffin & Cupcake Pan Set (2 Pack) – 12 Cup Regular + 24 Cup Min…
9. Chocolate Avocado Pudding

Recipe Details
Ingredients:
– 2 ripe avocados
– 1/2 cup cocoa powder
– 1/3 cup honey or maple syrup
– 1/2 cup almond milk
– 1 tsp vanilla extract
Instructions:
1. In a blender, combine avocados, cocoa powder, honey, almond milk, and vanilla.
2. Blend until smooth and creamy, scraping down the sides as needed.
3. Taste and adjust sweetness if necessary.
4. Spoon into dessert cups and refrigerate for at least 30 minutes before serving.
Tips:
– Top with berries or nuts for added texture.
– Store in the fridge for up to three days.
Frequently Asked Questions:
1. Can I use other sweeteners?
– Yes. Try agave or coconut sugar.
2. How can I make it smoother?
– Blend longer or add a touch more milk.
Chocolate Avocado Pudding
Editor’s Choice

Ghirardelli Sweet Ground Chocolate and Cocoa | 3 lb. | Baking & Desserts

Anthony’s Organic Cocoa Powder, 2 lb, Gluten Free, Non GMO, Unsweetened

Rtteri 30 Pack Plastic Dessert Cups 6 oz Clear Ice Cream Sundae Tasting …

mwellewm 300 Packs Dessert Cups with Spoons, 5 OZ Mini Clear Plastic Des…

Ramekins Set with 6 Silicone Lids, Mothers Day Gifts Creme Brulee Making…
10. Lemon Coconut Energy Bars

Recipe Details
Ingredients:
– 1 cup pitted dates
– 1 cup almond flour
– 1/4 cup shredded coconut
– Zest of 1 lemon
– 2 tbsp lemon juice
– Pinch of salt
Instructions:
1. In a food processor, blend dates until smooth.
2. Add almond flour, shredded coconut, lemon zest, lemon juice, and salt, blending until combined.
3. Press the mixture into a lined baking dish.
4. Refrigerate for about an hour before cutting into bars.
5. Store in the fridge for up to a week.
Tips:
– Top with more shredded coconut for extra crunch!
– Try adding nuts or seeds for additional texture.
Frequently Asked Questions:
1. Can I use other citrus fruits?
– Yes, lime or orange zest works well too.
2. How do I store these bars?
– Keep them in an airtight container in the fridge.
Lemon Coconut Energy Bars
Editor’s Choice

Hamilton Beach Electric Vegetable Chopper & Mini Food Processor, 3-Cup, …

Ninja Food Chopper Express Chop with 200-Watt, 16-Ounce Bowl for Mincing…

KitchenAid KFC3516ER 3.5 Cup Food Chopper, Empire Red, One Size

BLACK+DECKER 8-Cup Food Processor, Easy Assembly, Stainless Steel S-Blad…
Conclusion

Traveling in an RV doesn’t mean you have to sacrifice the joy of homemade goodies.
These gluten-free RV baking recipes are not only easy to make but also travel-friendly, ensuring that your sweet tooth is satisfied wherever the road takes you.
Try out these recipes and make your next adventure deliciously memorable!
Note: We aim to provide accurate product links, but some may occasionally expire or become unavailable. If this happens, please search directly on Amazon for the product or a suitable alternative.
This post contains Amazon affiliate links, meaning we may earn a small commission if you purchase through our links, at no extra cost to you.
Frequently Asked Questions
What are the best rv baking recipes for gluten-free travelers who want easy travel desserts and compact baking treats?
If you’re road-tripping in an RV and keeping gluten-free goals, these rv baking recipes are perfect for easy travel desserts and compact baking treats.
Choose options that use a single pan or no-bake methods, rely on shelf-stable ingredients, and bake quickly.
In this article, you’ll find 10 travel-friendly gluten-free sweets that fit small kitchens and busy schedules.
Pro tips: pre-measure dry ingredients into labeled containers, pack a compact mixing bowl and whisk, and use your RV oven, microwave, or toaster oven when available. With thoughtful planning, you can enjoy delicious portable sweet recipes on the road.
How can I bake portable sweet recipes in a tiny RV kitchen with limited appliances?
In a tiny RV kitchen, go for portable sweet recipes that can bake in a single pan or in a microwave.
Favor no-bake or 1-pan options to minimize dishes, and use a toaster oven or RV oven if you have one.
Pack ingredients that travel well and require no refrigeration until opened, and pre-measure everything before you hit the road.
A few smart moves: measure dry ingredients into small jars, keep a silicone mat for easy cleanup, and heat desserts using the appliances you actually have aboard.
Which RV-friendly desserts are quick baking ideas that stay fresh for a road trip?
RV-friendly desserts that are quick to make and stay fresh for a road trip include no-bake bars, bite-sized cookies, and mug-style cakes.
These are perfect as quick baking ideas because they use minimal equipment and small portions.
Store finished treats in airtight containers or snack bags to keep them fresh between stops, and if you have a fridge, a quick chill can help set bars and cookies.
All of these options fit into rv baking recipes that keep gluten-free road-tripping simple.
What gluten-free ingredients work best for compact baking treats on the road?
Gluten-free on the road loves efficient ingredients: almond or coconut flour, gluten-free oats, eggs, yogurt or applesauce as binders, and natural sweeteners like honey or maple syrup.
Keep staples in small, airtight containers to build compact baking treats with fewer shopping trips.
For texture, you can pair nut flours with a little starch (like arrowroot) and use butter or coconut oil for fat.
Store in a cool, dry place and bake in batches to use the limited RV oven time wisely.
How can I tailor these quick baking ideas to allergies or dietary needs while RVing?
To tailor these quick baking ideas for allergies or dietary needs while RVing, read labels carefully and choose certified gluten-free ingredients.
Swap dairy or eggs as needed: flax eggs or applesauce for binding, dairy-free margarine or coconut oil, and seed butters for peanut butter if there are allergies.
Keep a small allergy-friendly kit on board and test substitutions before you leave.
With a little planning, you can enjoy delicious portable sweet recipes that meet your needs without sacrificing flavor.
Related Topics
RV baking recipes
gluten free
easy travel desserts
compact baking treats
portable sweet recipes
RV-friendly desserts
quick baking ideas
family friendly
no bake options
dessert on the go
simple recipes
camping snacks